Wednesday 21 December 2016

Dark Dramatic Winter Makeup

Since today is the official first day of Winter, I thought I would do a post on this dark dramatic winter makeup look. I know this may be way too much makeup for some people but you can always adapt it to suit your style :)


Eyes: For this look I started with the eyes. I usually do this when there is a lot of blending to do with dark colors and I don't want to deal with fall out all over my foundation after. Its so frustrating! I first primed my eyes with Urban Decays Primer Potion in Eden. Then, I used MAC's Paints Cream Eye shadow in black on my lid only to act as a base. I believe they no longer sell this product in black so you can use any cream black eye shadow or eyeliner you have. I then blended out the harsh edges with a blending brush and a little bit of black powder eye shadow. You really have to work at this. Stay close to your lash line and avoid taking the black to high up your brow bone. I make this mistake all the time and end up looking like I got punched in the face. Not the look I was going for...So really take your time blending! I also blended a little bit of the black eye shadow along my lower lash line to give it a smokey effect.

Once you are satisfied with the blending, add any iridescent eye shadow you have on top of the black. Again, don't apply this shadow to high - try sticking close to your lash line. For eyeliner I used Makeup Forever Aqua Eyes pencil eyeliner in Matte Black and lined my water line. I then went in with Kat Von D's Tattoo Eyeliner in Trooper and lined my top lash line. For Mascara I used Makeup Forever's Smokey Lash in Extra Black.

Optional: I added two rhinestones to my lids for dramatic effect. I used some cosmetic rhinestones and cosmetic glue to apply them with a Q-tip. Easy :)

Skin: In the winter my skin tends to get a little on the dryer side so instead of sticking to my usual matte foundation routine I sometimes reach for something a little more hydrating. I really love the Diorskin Forever Perfect Makeup Foundation and Giorgio Armani Luminous Silk foundation for a dewier complexion. For this look I used the Dior foundation. I blended it with my Beauty Blender until there were no harsh edges. For concealer, I also opted for something a little more hydrating. I used the MAC Moisture Cover Concealer in NC20 and used the pointy end of my Beauty Blender to blend this out.

Because my skin was on the dryer side I chose not to "bake" or add any heavy loose powders to my face. Instead, I brushed on a little bit of pressed powder under my eyes just to set my concealer lightly. For highlight I used MAC's Mineralize Skinfinish in Soft & Gentle. For blush I went for the Tarte Amazonian Clay Blush in Amused and applied it lightly, just to add a little bit of color. I didn't want to do anything too dramatic for blush as there is so much already going on with the eyes. Likewise, I did very little in terms of contour and just added a little bit of the middle shade of the Smashbox Step-By-Step contour Kit to the hollows of my cheeks.

Brows: For my eyebrows I did my regular Anastasia Beverly Hills routine. I use the Pomade in Dark Brown to fill them in and then use Brow Wiz in Dark Brown to fill in any little gaps not covered by the pomade.You can also use the NYX Microbrow Pencil instead of the Anastasia pencil, if you would like to save some $$ It is quite a bit cheaper and also works really well. I am very lacking in the eyebrow department so I find this routine of using both a pomade and pencil work best for me.

Lips: On my lips I used three different types of  MAC lip products: lip liner, lipstick and lip gloss. The lip liner I used is MAC Lip Pencil in Vino and the lipstick is MAC Lipstick in Rebel. I applied the lipstick very lightly then topped it all off with MAC Lipglass in Russian Red. I wanted to add more of the red to give it a berry color.

Hope you enjoyed reading!

xo
Julisse

Beauty Blender vs. Real Techniques Miracle Complexion Sponge

Welcome back to my blog J So today I thought I’d do a review on the Beauty Blender vs. the Real Techniques Miracle Complexion Sponge. I get asked about which I prefer or think is better all the time so I thought I’d do a post about what I think! Before I begin I just want to mention that this is my opinion and what works for me and may not necessarily be best for you given our different skin types and foundations. So please stick to what you love if you already have a favorite.

Beauty Blenders:
Let me just say I absolutely love these egg shaped sponges! They come in five different colors: nude, pink (original), white (pure), grey (beauty blusher) and black (pro). The nude sponge is designed to be used for all different kinds of foundations only. The original pink sponge is made for all complexion products such as powders, cream blushes, and more. The white sponge is made for the silky application of skincare, such as serums and moisturizers, and makeup; it is also more geared towards sensitive skin. The grey sponge is specifically made to blend all kinds of blushes, from creams to powders. The black sponge is made for professionals and best for applying darker tones, long wear cosmetics, and self-tanners. They also have the mini beauty blenders designed especially to highlight, contour, and conceal. Here are some images to help you remember all of that:


I have tried all these sponges except for the white one as they don’t sell them at my local Sephora yet. I mostly use matte foundations due to my combination oily skin, and personally I have found the black sponge works best for this. That’s why it’s my favorite! It blends out beautifully and doesn’t ruin the sponge. I used the nude sponge with my matte foundations and within weeks the sponge was ruined…I almost cried. It dried up the sponge so much that it couldn’t blend anything and I had to stop using it. However, with my other non-matte foundations the nude sponge worked just as well. So, I think the nude sponge is made more for silkier liquid foundations and the black sponge made more for long lasting matte foundations. 

The pink sponge works for just about anything so if you’re looking for one sponge that does it all, this one is definitely it. However, over time it also gets ruined with matte foundations unless you clean it after every single use (which you should probably be doing anyways but really who has time for that :P). I don’t really understand the purpose of the grey blush sponge. It is smaller so I guess that makes it easier to apply blush, but I find the original pink sponge does this pretty good already. I feel the same about the mini sponges. Yes, they are smaller and more precise, but they are too small to do anything else other than highlight and contour which I personally find the pointy end of a regular sized beauty blender does a great job at already. 

To summarize, I find the black sponge works best for me as I tend to use more matte foundations. That being said, I think all beauty blenders’ work amazing, and beat any of my brushes by a landslide when it comes to blending and applying complexion products flawlessly.

Real Techniques Miracle Complexion Sponge:
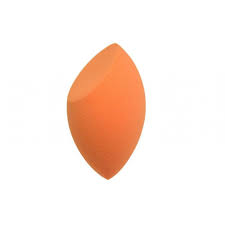
Next up is the Real Techniques Miracle Complexion Sponge. I wanted to find a dupe of the beauty blender that worked well and wasn’t as expensive. So I did a little bit of research and found that many people loved this sponge and found that it worked just as well if not better than the Beauty Blender. The Beauty Blender sells for $28.00 CAD each and the Miracle Complexion Sponge sells for $7.69 CAD each (they also have value packs). I had to try it!!! Here is what the sponge looks like outside its packaging:


Unfortunately, I found that it didn’t meet my standards for one reason and one reason only: it absorbs WAY too much product. When it comes to blending and getting a flawless finish this sponge works well BUT it absorbs so much product that I end up using much more than I would have with my Beauty Blender. Sadly, this means I waste a lot more product and makes this cheaper sponge not so worth it L I even tried soaking it for longer to see if maybe that would make it retain less product but that didn’t work either. I was pretty choked up about this since this sponge had so much potential such as the straight flat edge on one side. I normally love Real Techniques products, but I was pretty disappointed in this one. 

However, it’s not all bad!!! I started using this sponge with cream and powder products and it works AMAZING (I was pretty relieved since I bought a 4 pack). So if you’re looking for a sponge to apply powders and creams this is a good one. I use it to pick up loose powders to “bake” or “cook” (or whatever you want to call it) my concealer and it works like a dream; especially because the flat edge works really well at fitting the under eye area and creating a sharp edge for contouring. I also tried it with my cream blush and powder highlight and it worked great! Another great thing about this sponge is its durability. I find it lasts much longer than my Beauty Blender and products wash out of it much easier. However, that might just be because I don’t use it as much and avoid using liquid foundations with it.

So all in all, the Beauty Blender sponges still have my vote because of its versatility and ability to be used with literally any complexion product. However, for creams and powders the Real Techniques sponge works just as well if not better (due to the flat edge) at a cheaper price point.

**On a side note, I ordered a Silisponge to review for you guys, which should be coming in the next month or two (it’s on back order). If you haven’t heard about the Silisponge, it is a silicone sponge that is supposed to work like a Beauty Blender at applying complexion products WITHOUT absorbing any product (sounds pretty amazing to me). Will keep you posted!

Thanks for reading! J

Julisse

Thursday 15 December 2016

Spring Look - Collaboration with Ross McDyre

Last spring I did a collaborative photo-shoot with Ross McDyre. Ross is a professional photographer specializing in fashion, portraiture, and commercial assignments. He used  to be based in Vancouver but recently got married and moved to Manchester, UK. Congrats Ross! Check out his amazing pictures on Instagram @alelephotography and @livingmanchester

We've been having such unusually cold weather where I live so I decided an early spring makeup look would be perfect to remind us of the warmer weather coming soon...hopefully. Here is a shot from the photo shoot:


If you're interested in finding out how I created this look, keep reading :)

Let’s start with skin. The foundation I used is NARS All Day Luminous Weightless Foundation (in shade Punjab). Wow this foundation great! It glides on so smoothly and you only need a tiny amount to cover your entire face because the coverage is so amazing. This is definitely getting added to my list of favorite foundations. It sells for $59.00 which is above average for a foundation but the quality is so great it is worth a purchase. As you may know, I prefer buying one good quality foundation over a ton of cheaper foundations that don’t really cut it. Don't get me wrong there are many cheaper foundations that work great…but I'll be talking about that in another blog post. Anyways, why do I always get sidetracked? I applied this foundation with a Sigma F84 - Angled Kabuki brush. If I am going to use a foundation brush guys, it's this one. If you haven't tried their brushes before check them out here: http://www.sigmabeauty.com/ They’re amazing and decently priced.

I then used MAC Cosmetics Select Moisturecover in NC20 to conceal under my eyes, and blended it out with, you guessed it, a Sigma concealer brush.

For contouring and highlighting, I used the Smashbox Master Class Palette III – Color & Contour. Unfortunately, they no longer sell this palette; however, they recently came out with the Smashbox Master Class Palette: Lighting Theory which has similar highlight and contouring colors (in cream), plus some. It looks like this:


This palette is beautiful! It sells for $75.00 CDN which I thought was just an awesome deal for what you're getting. It contains all of the following:

-16 x 0.02 oz Photo Op Eye Shadow in Sand (pastel beige matte), Totally Nude (pinky beige matte), Nectar (peach matte), Almond (warm nude matte), Truffle (taupe matte), Light Wave (midtone brown metallic), Sunrise (warm gold metallic), Sunlight (rose gold metallic), Optics (deep gray metallic), Metallic Violet (deep purple metallic), Metallic Bronze (bronze metallic), Metallic Brick (red brown metallic), Nocturnal (navy metallic), Blackout (black matte), Sumatra (dark brown matte), Backlit (black with red pearl metallic) 

- 3 x 0.09 oz Blush in Candlelight (midtone pink), Carnation (midtone pink with gold pearl), Spectrum (midtown brown pink) 


- 4 x 0.04 oz Cream Color Corrector in Lavender (corrects sallowness/yellowness), Green (corrects redness), Peach (corrects dark spots for fair to medium skintones), Orange (corrects dark spots for darker skintones) 


- 3 x 0.16 oz Contouring Cream in Contour (dark brown), Bronze (brown), Highlight (creamy beige) 

- 3 x 0.15 oz Cream Highlighter in Luminous Gold (gold shimmer), Luminous Pink (pink shimmer), Luminous Peach (peach shimmer) 

- 4 x Get the Look insert 


This has become my go to palette and I've been using it even more than my Urban Decay Naked Pallets, which you guys know I adore! I applied the contouring and highlighting color with a MAC angle brush. The contour shade went in the hollows of my cheeks, and the highlighting shade I applied on the highest point of my cheekbones. The blusher I used is the lightest shade of pink in this palette, and I applied that right above the contour shade and below the highlighting shade. Think Neapolitan ice cream haha.

Let’s move on to eyebrows. I've recently changed my eyebrow routine from powder to pomade. Reason being, I tried the Anastasia Beverly Hills Dipbrow Pomade and fell in love! I use the dark Brown color. It sells for $23.00 CAD. I applied this product with a cheap Essence angle brush and voila, so easy.

On the lips I mixed two MAC Cosmetics Lipsticks in Pink Pigeon and Heroine. I love these colors, and they are so perfect for spring. Here is a picture of what they look like. Each lipstick sells for $21.00 CAD:

Pink Pigeon:

Heroine:

Moving on to the eyes. I applied my Urban Decay eyeshadow primer in Eden first before applying any color. I then used the Smashbox Master Class Palette III – Color & Contour. As I mentioned earlier this palette is no longer being sold :( But, you can use any eyeshadows you have that are similar to the following purple shades: Lavender, Lilac, and Violet (see below).


 Lavender I applied to the inner corner of my eyes; then, in the center of my eyes I used Lilac. Finally, on the outer corner of my eyes I used Violet. I then blended everything together with a blending brush. On my brow bone and my tear duct area I used Oyster, which is a white pearly eyeshadow, to highlight. 

The liquid liner I used is Kat Von D’s Tattoo Liner in Trooper; this has been my go to eyeliner for years now. It's so easy to apply and the black is a true black. It sells at Sephora for $23.00 CAD.

Finally, for mascara I used Makeup Forever Smoky Extravagant Mascara. I received a sample from Sephora a while ago and I really love it. It really does add volume, length, and curl to the lashes as advertised. Also, similar to the KVD liquid eyeliner it's a true black. 

And that's it!! Overall, this was a super easy makeup look to achieve and was so much fun! Hope you enjoyed reading.

Julisse :)

Wednesday 14 December 2016

Follow Me on Instagram

For those of you who asked, I'm on Instagram as:

julisse_l

I post pictures regularly :)

J <3 

My Life Update!

Hello my beautiful friends :)

Firstly, I want to apologize for being MIA for such a long time. I seriously can't believe how long it's been since my last post. So much has happened since, and I am so excited to fill you all in! As many of you know, I got married in October and was extremely busy planning and settling into my new married life. Though it has been extremely fun, I have missed blogging about all things beauty! So, I'm back. My goal is to post at least once every few weeks to keep you guys in the loop on all the new/old products I'm trying, loving, and hating. I will also be posting about any deals and promos I find.

Secondly, many of you have asked about my wedding and wedding makeup. I promise I will be doing a full post on that very soon! So keep an eye out for that. For now, here is a sneak peak of the makeup and hair I did on myself that day.


Lastly, feel free to send me a message about any products you have questions about or would like me to try. I welcome suggestions.

Talk soon,
Julisse <3